Tuesday, 31 March 2020

Hiding ONLY the Shutdown Button in Windows

Working from home has never been more popular (or enforced) than in the current times. In view of this, we have configured our workstations to allow our staff remote access through the Remote Desktop Protocol (RDP).

However, the habit of shutting down a workstation after a work day to conserve power seems to be a hard one to break. Computers were being remotely shutdown on a regular basis despite the additional warning that computers would need to be powered on manually on-site when attempting the action through a remote desktop connection. While computers could be powered on remotely with Wake-on-LAN (WOL), this quickly got old. A thought of solution was to disable the shutdown menu option on the Windows Start Menu.

A possible group policy setting was quickly found and tried
(Computer Configuration / Policies / Administrative Templates / Start Menu and Taskbar / Remove and prevent access to the Shut Down, Restart, Sleep, and Hibernate commands).
Unfortunately, this setting not only removed the Shut Down option, but all other power options as well.


A computer with Remote Desktop enabled will be able to respond to RDP requests while in sleep mode if its network adapter supports ARP and NS Offload. As all the network adapters in our office machines support this we want our staff to be able to put their workstations to sleep to conserve power, which still allows an incoming RDP connection to wake the computer; but not to shutdown the computer. More information on ARP and NS Offload features may be found on the Energy Star website here:
https://www.energystar.gov/products/low_carbon_it_campaign/business_case/24_7_remote_access


Further research lead us to the HideShutDown registry setting which simply hides the Shutdown menu option in the Start Menu
(HKEY_LOCAL_MACHINE\SOFTWARE\Microsoft\PolicyManager\default\Start\HideShutDown). To enable this setting, create a new DWORD with a value of 1.


EDIT: Some computers have a key in 
HKEY_LOCAL_MACHINE\SOFTWARE\Microsoft\PolicyManager\current\device\Start
which may prevent the default defined above from taking effect. An entry in group policy to delete the offending registry key was also defined to ensure the defaults take effect.

Once the group policies have been propagated to all concerned computers, the Shut Down menu option disappears from the Start Menu, while still allowing users to restart their computers or put them in sleep mode.


Users with permission to shutdown computers may still do so using the "shutdown /s /t 0" command, but then we assume they know what they're really doing.

Thursday, 3 October 2019

Saturn PCB Toolkit for PCB-related Calculations

The Saturn PCB Toolkit is a handy freeware tool for PCB design-related calculations.

It is particularly useful for helping us find a starting point for controlled-impedance traces for RF and differential signals, such as RS-485. Impedances for traces such as differential pairs, microstrips, striplines or coplanar wave are easily calculated by referring to a visual layout and entering appropriate values.


Other convenient calculators include those for finding capacitor/inductor reactance, thermal resistance, wire gauge parameters, among others.

Check it out at http://www.saturnpcb.com/pcb_toolkit/

Thursday, 6 June 2019

FreeRTOS support for Silicon Labs EFR32BG/MG Bluetooth Stack

tl;dr Click here to go to GitHub.

This post provides usage information on AndrewLabs' FreeRTOS support library for the Silicon Labs' Bluetooth SDK.

The Silicon Labs' Bluetooth SDK for the Blue Gecko and Mighty Gecko wireless SoCs officially supports Micrium RTOS. The costs involved with using Micrium RTOS may be prohibitive with small commercial projects. Here at AndrewLabs we are more familiar with FreeRTOS, having used the kernel in many of our projects.

Using FreeRTOS is possible by porting over the Micrium RTOS code provided in the SDK.

We have made our source code for using FreeRTOS with the SiLabs Bluetooth SDK available on GitHub. Version 2.11.5 of the Bluetooth SDK used for this article. The compiler used was GNU ARM Embedded Toolchain 7-2017-Q4 installed in Simplicity Studio SV4.1.10.0.

While porting over to FreeRTOS, an attempt was made to follow the documents "UG136: Silicon Labs Bluetooth C Application Developer's Guide" and "AN1114: Integrating Silicon Labs Bluetooth Applications with the Micrium RTOS" as closely as possible. This includes maintaining the names of global variables and functions.

The following describe the steps required to use the Bluetooth Stack in FreeRTOS starting from the Silicon Labs soc-empty template project:
  1. Ensure you have FreeRTOS and the Bluetooth SDK properly functioning on your device.
  2. Remove references to native_gecko.h from your project.
  3. Include freertos_bluetooth.c and freertos_bluetooth.h in your project.
  4. Make sure the Bluetooth stack config_flags configuration has the GECKO_CONFIG_FLAG_RTOS flag set:
    static gecko_configuration_t config = {
        .config_flags = GECKO_CONFIG_FLAG_RTOS,
        // ...
    };
  5. Configure interrupts in your MCU initialization function, since specifying the GECKO_CONFIG_FLAG_RTOS flag turns off interrupt configuration in the Bluetooth stack:
    // Radio interrupts.
    NVIC_SetPriority(FRC_PRI_IRQn, 1);
    NVIC_SetPriority(FRC_IRQn, 1);
    NVIC_SetPriority(MODEM_IRQn, 1);
    NVIC_SetPriority(RAC_SEQ_IRQn, 1);
    NVIC_SetPriority(RAC_RSM_IRQn, 1);
    NVIC_SetPriority(BUFC_IRQn, 1);
    NVIC_SetPriority(AGC_IRQn, 1);
    NVIC_SetPriority(PROTIMER_IRQn, 1);
    NVIC_SetPriority(RTCC_IRQn, 4);      // Required for EFR32BG1 and EFR32BG12 only.
    
    Other interrupts should be configured as required.
  6. Start the Bluetooth link-layer and stack tasks in your main function or equivalent:
    bluetooth_start_task(BLUETOOTH_LL_PRIORITY, BLUETOOTH_STACK_PRIORITY);
    app_bluetooth_start_task();     // Your application's Bluetooth task.
    vTaskStartScheduler();          // Start the FreeRTOS scheduler.
    
    BLUETOOTH_LL_PRIORITY must be the highest priority task in your system and BLUETOOTH_STACK_PRIORITY should be set according to your application needs.
  7. In your application's Bluetooth task, wait for the BLUETOOTH_EVENT_FLAG_EVT_WAITING flag in the bluetooth_event_flags event group, indicating an event from the stack is waiting to be handled by the user application:
    for (;;)
    {
        xEventGroupWaitBits(bluetooth_event_flags, BLUETOOTH_EVENT_FLAG_EVT_WAITING, pdTRUE, pdTRUE, portMAX_DELAY);
        // ...
    
  8. Handle the event appropriately by examining bluetooth_evt:
        switch (BGLIB_MSG_ID(bluetooth_evt->header))
        {
            case gecko_evt_system_boot_id:
    // ...
    
  9. After handling the event, flag it as handled by setting BLUETOOTH_EVENT_FLAG_EVT_HANDLED in the bluetooth_event_flags event group:
        // ....
            default:
                break;
        }
    
        xEventGroupSetBits(bluetooth_event_flags, BLUETOOTH_EVENT_FLAG_EVT_HANDLED);
    }
The Bluetooth stack sets a block on the EM3 energy mode if SLEEP_FLAGS_DEEP_SLEEP_ENABLE is specified in the configuration struct, allowing the SoC to enter the EM2 energy mode. Otherwise, it sets a block on the EM2 energy mode, only allowing EM1 to be entered. The sleep driver must be manually initialized when using an RTOS.

Note that as the HFXO clock is not available in EM2, the SysTick timer will not operate. FreeRTOS will need to be configured for tickless idle mode.

Thursday, 9 May 2019

Using the Laird RG191 LoRaWAN Gateway in Singapore (and other countries)

The Laird Connectivity RG191 (and the sister model RG186) is a LoRaWAN gateway in a nicely packaged form factor. You might have had held off getting one thinking that it could not support frequency plans such as AS923 or AU915-928, despite sharing the same frequency band as the officially supported US902-928.

Here in Singapore, we allocate the same 868 MHz ISM band as EU countries. We could in theory, use the RG186 with the EU863-870 frequency plan legally. However, this goes against the LoRaWAN 1.0.2 Regional Parameters document, which state that devices here should use the AS923 (specifically the AS 920-923MHz) frequency plan.

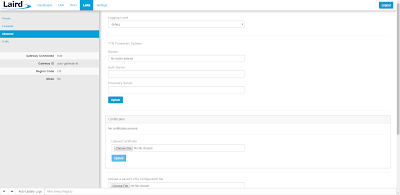
A look at the configuration page of the RG191 confirms the firmware only supports the US-style frequency plan. AS923 is not supported, as it does not use the 500kHz channels mandated by the firmware:

We are a community member of The Things Network (TTN), and fortunately, the gateway has support for the TTN Packet Forwarder built-in. One advantage of the TTN Packet Forwarder in this case is that the frequency plan to be used is selected in the TTN console, and not on the gateway itself.

The following describes the procedure to configure a RG191 to use the TTN Packet Forwarder with frequency plans centred around 915MHz other than what is officially supported, such as AU915-928, AS923 or KR920-923. It should work on a RG186 for the INDIA 865-867 frequency plan, though we have not tested this.

The first step is to register a new gateway in the TTN Console, setting the frequency plan and router according to your own locality. Since the set up is for the TTN Packet Forwarder, not the Semtech Packet Forwarder, make sure the check-box remains unchecked:

Then grab the gateway key from the gateway overview page:


Set up the forwarder in the RG191 configuration page, dumping the gateway key into the appropriate text boxes:

Also, set the LoRaWAN forwarder in the LoRa/Advanced tab, taken from the gateway registration step above:
Your gateway should be connected to The Things Network and operating on the frequency plan selected on the TTN Console once the above configuration steps are completed:
The firmware in use on our RG191 at the time of this post is version 93.7.3.4. At the time of posting, the TTN Packet Forwarder is not being actively developed. However, it continues to be supported by The Things Network, and remains a valid workaround to support other frequency plans on the Laird RG191 LoRaWAN gateway.

Thursday, 4 April 2019

Optimising XC8 - Accessing Struct Members By Pointer

When passing struct data by pointer to a C function, the arrow operator "->" is typically used to dereference the pointer and access the value of a member.

On PIC 8-bit microcontrollers, using the MPLAB XC8 compiler, each access to a struct member from a pointer requires additional instructions to first deference the pointer before the value is made available. This may produce bloated code, resulting in a larger program and slower execution.

Version 2.00 of the XC8 compiler was used for this article. Optimization level was set to "1" (the highest level available in Free mode), and the target MCU was arbitrarily selected as PIC18F46J50.

Consider the following example:
#include <xc.h>
#include <stdint.h>

typedef struct
{
    uint8_t data[16];
} LARGESTRUCT_T;

static void modifyData(LARGESTRUCT_T *pdata)
{
    pdata->data[0] = 0;    // Access struct member directly.
    pdata->data[1] = 1;
    pdata->data[2] = 2;
    pdata->data[3] = 3;
    pdata->data[4] = 4;
    pdata->data[5] = 5;
    pdata->data[6] = 6;
    pdata->data[7] = 7;
    pdata->data[8] = 8;
    pdata->data[9] = 9;
    pdata->data[10] = 10;
    pdata->data[11] = 11;
    pdata->data[12] = 12;
    pdata->data[13] = 13;
    pdata->data[14] = 14;
    pdata->data[15] = 15;
}

static void useData(const LARGESTRUCT_T *pdata)
{
    // Do something useful with data here.
}

void main(void)
{
    LARGESTRUCT_T data;
    
    for(;;)
    {
        modifyData(&data);
        useData(&data);
    }
}
The space requirements for the above code:

We are primarily concerned with the data and program memory used, which are 18 bytes of data memory, and 288 bytes of program memory.

Taking a look at the machine code produced by the compiler:
;main.c: 12:     pdata->data[1] = 1;
  lfsr 2,1
  movf modifyData@pdata,w,c
  addwf fsr2l,f,c
  movf modifyData@pdata+1,w,c
  addwfc fsr2h,f,c
  movlw 1
  movwf indf2,c
From the above snippet, we see each access to a member requires that its address be placed into the FSR2 register before a value is assigned to the memory address through the INDF2 register.

In some situations, instead of using a pointer to a struct, we can store a local copy of the data. The local copy is then modified as required, before the modified data is copied back to the pointer address:
static void modifyData(LARGESTRUCT_T *pdata)
{
    LARGESTRUCT_T localData = *pdata; // Store local copy of data.
    
    localData.data[0] = 0;            // Modify local copy.
    localData.data[1] = 1;
    localData.data[2] = 2;
    localData.data[3] = 3;
    localData.data[4] = 4;
    localData.data[5] = 5;
    localData.data[6] = 6;
    localData.data[7] = 7;
    localData.data[8] = 8;
    localData.data[9] = 9;
    localData.data[10] = 10;
    localData.data[11] = 11;
    localData.data[12] = 12;
    localData.data[13] = 13;
    localData.data[14] = 14;
    localData.data[15] = 15;

    // Copy modified data back to pointer address.
    *pdata = localData;
}
The machine code produced is greatly simplified:
;main.c: 14:     localData.data[1] = 1;
  movlw 1
  movwf modifyData@localData+1,c
Reviewing the reduced size of the code produced:

The size of the program code produced was halved in this case. However, the amount of data memory has increased by the amount of data we have stored locally in the function (16 bytes). The good news is that as the size of data memory allocated is shared among functions with local storage as the compiler sees fit, you may see minimal increases depending on the rest of your application code.

In many of our projects, the trade off in added data memory requirements is worth the program memory and CPU cycles saved.

Friday, 15 March 2019

Things to Come

Bookmark this site for insights on electronics product development, IT problem solving, 3D printing and other articles of interest to our developers.

Meanwhile visit our store for our architectural DMX lighting and water jet accessories, as well as time and clock electronics.